Hands-On Lab: Excel Data Validation Without Formulas
⏳ Duration: 1–2 Hours
🎯 Level: Beginner – Intermediate
🧠 Method: Hands-on Practice
📦 Format: Interactive, offline-friendly
📌 Requirements: Basic data entry skills in Excel
🎯 Objective: Participants will be able to apply basic data validation using Excel's built-in features (no custom formulas).
Excel offers a powerful Data Validation feature to restrict user input based on specific criteria. This tutorial shows how to use built-in options — no formulas needed.
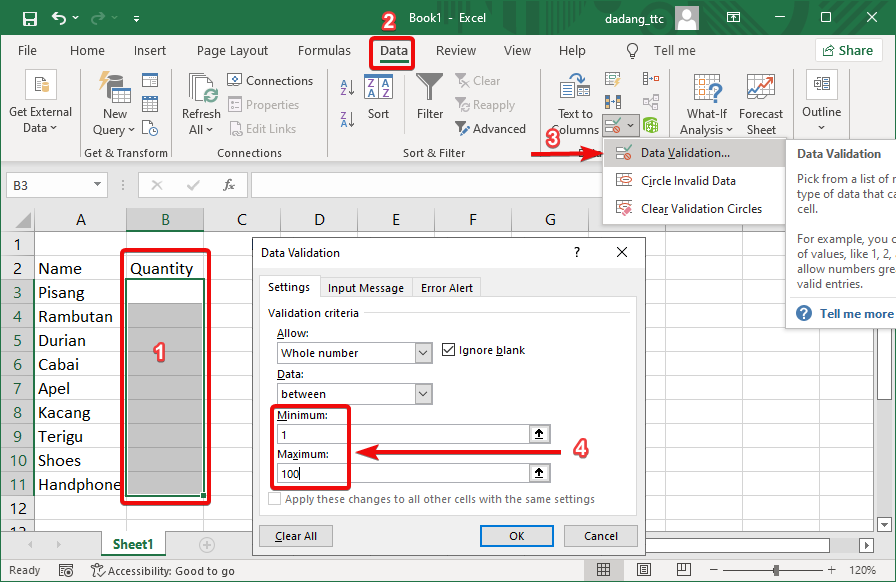
📦 Case Study 1 – Whole Numbers Between 1–100
Use Whole number to restrict input between 1 and 100, such as for a Quantity column.
- Select the column for input (e.g., column B).
- Go to Data → Data Validation.
- Select Whole number, set Minimum:
1, Maximum:100. - Click OK.
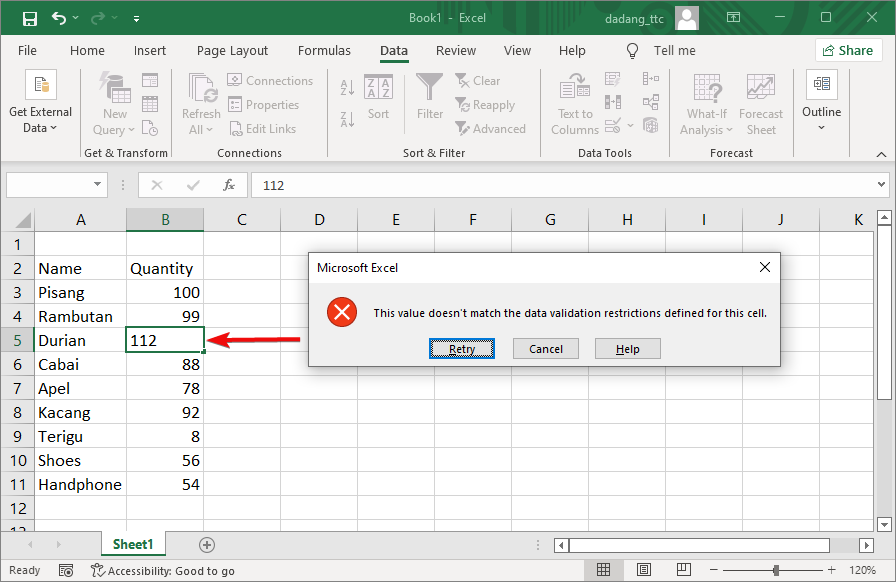
In this video, we use a slightly different case: an order form where users are only allowed to enter an order quantity between 1 and 5. With this validation, we prevent values that are too small or too large, keeping the form clean and well-controlled.
🎥 Video Tutorial: Decimal Validation with Between
📥 Sample Excel File:
Use the same file as shown in the video so you can practice directly.
⬇️ Download the Excel file📦 Case Study 2 – Dropdown List
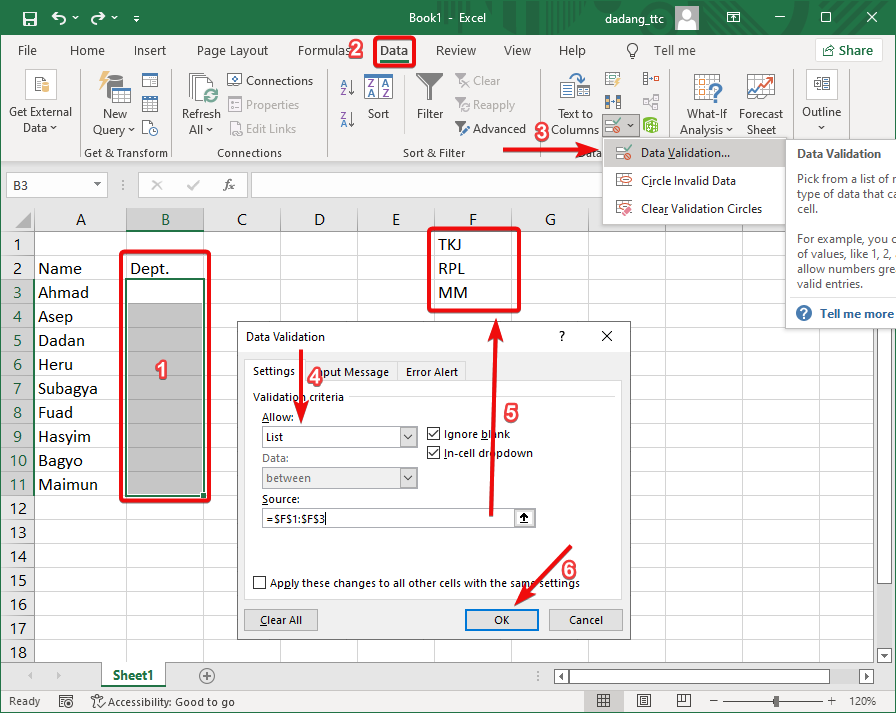
Use List so users can only select from specific values, such as department options: TKJ, RPL, MM.
- Type the options in another range, e.g.,
F1:F3. - Select the target column (e.g., column C).
- Go to Data → Data Validation, select List.
- Set
=F1:F3as the Source. - Click OK.
In this video, we discuss the List feature using the same order form. The goal is to restrict user input to a predefined list of departments in a factory. For example, to avoid typing mistakes such as “manupaktur” instead of the correct “manufacture”, we create a List dropdown containing valid department names. This approach keeps the data clean, consistent, and free from typing errors.
🎥 Video Tutorial: Validation with List
📥 Sample Excel File:
This file is also used in the List Validation video (department dropdown).
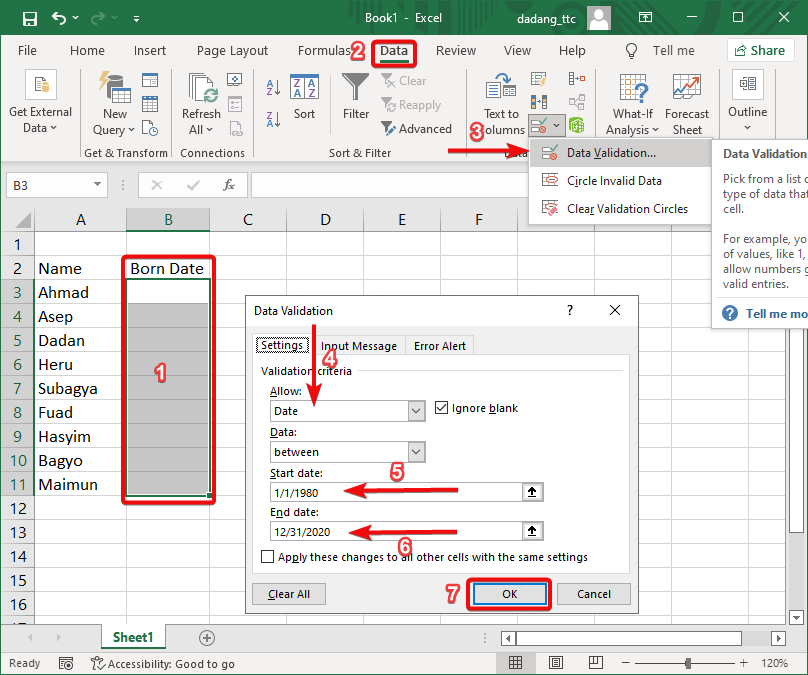
⬇️ Download the Excel file📦 Case Study 3 – Date of Birth
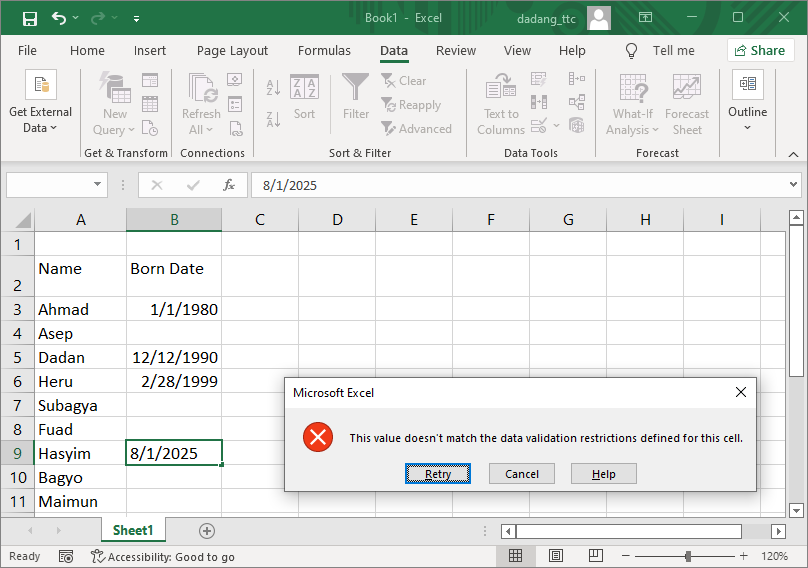
Limit dates within a specific range. Example: only allow dates between Jan 1, 1980 and Dec 31, 2010.
- Select the column for date input (e.g., column D).
- Go to Data → Data Validation, select Date.
- Set condition: between. Start date:
1/1/1980, End date:12/31/2010. - Click OK.
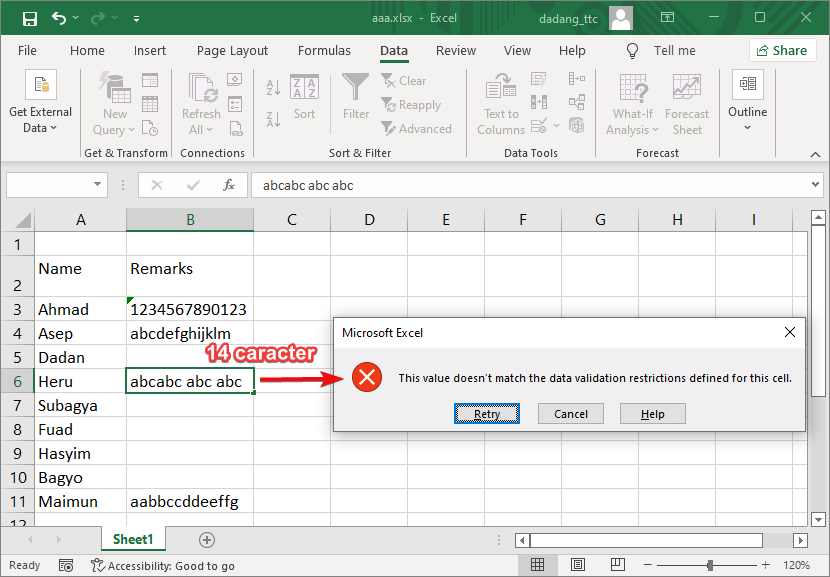
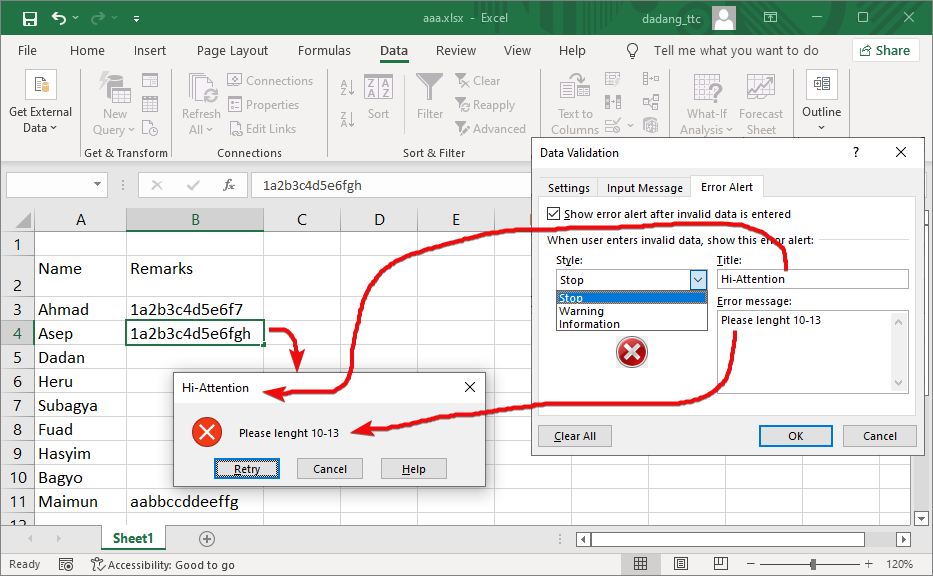
📦 Case Study 4 – Phone Number Text Length
Use Text length to ensure phone numbers are between 10 and 13 digits.
- Select the input column (e.g., column E).
- Go to Data → Data Validation.
- Select Text length, set Minimum:
10, Maximum:13. - Click OK.

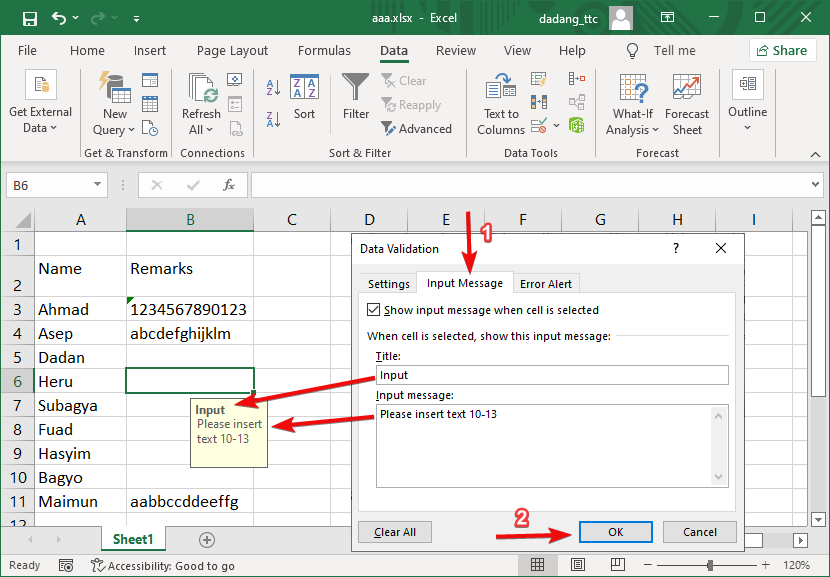
💬 Add Input Message & Error Alert
You can add an Input Message and Error Alert to help users input data correctly.
- In the Data Validation window, go to the Input Message tab.
- Fill in the title and message to show when the cell is selected.
- Go to the Error Alert tab, choose Style: Stop, and set the error message.
Want to Learn Excel & Computers for Free?
Visit the complete guide and join our free training by TTC:
Want to Take Data Validation Further?
Learn how to create Custom Data Validation in Excel to make data input more flexible and tailored to your needs:
🛠️ Learn Custom Validation