Hands-On Lab: ID Data Validation Without Script
⏳ Duration: 1–2 Hours
🎯 Level: Beginner – Intermediate
🧠 Method: Hands-on practice
📦 Format: Interactive, offline-ready
📌 Requirement: Able to enter data in Excel
🎯 Goal: Participants can create simple data validations (unique ID, proper format) without macros/VBA.
The Custom Data Validation feature is used to restrict input so it follows the rules we set. For example, allowing only 16-digit numbers for a National ID, a code format like A12345, or preventing duplicate entries. This way, your Excel table becomes cleaner and free from input errors.
Many Excel forms require users to enter a unique ID or code. But how can we ensure the input is not blank, not duplicated, and follows a specific format? The answer: use Excel's built-in Data Validation feature — no scripting needed!
📦 Case Study 1 – ID Format
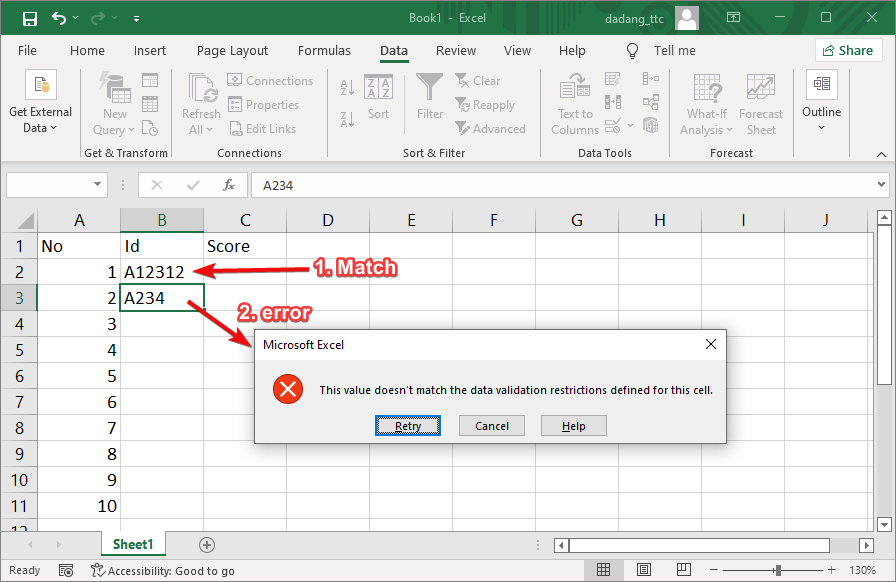
You're creating a participant list. Each participant must have an ID that follows these rules:
- Exactly 6 characters
- Starts with the letter “A”
- Followed by 5 digits (e.g.,
A12345)
✨ Steps
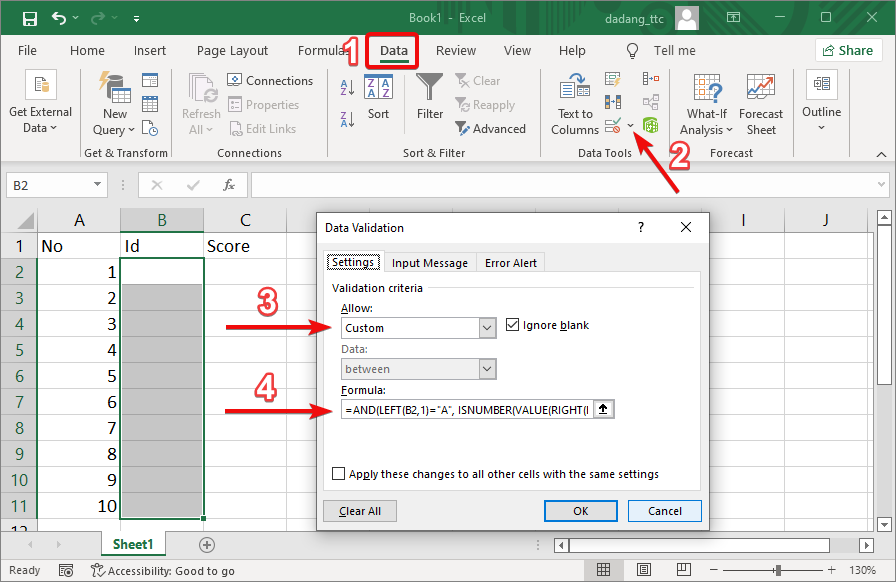
- Select the column where IDs will be entered (e.g., column B).
- Go to Data → Data Validation → Data Validation.
- Select Custom and enter the following formula:
=AND(LEFT(B2,1)="A", ISNUMBER(VALUE(RIGHT(B2,5))), LEN(B2)=6) - Check Ignore blank and add an error message in the “Error Alert” tab. Click OK.
📦 Case Study 2 – Prevent Duplicate IDs
This time, you want to ensure each ID is unique — no two participants can have the same ID.
- Each ID must appear only once
- If someone types an already-used ID, Excel will reject it
✨ Steps
- Select the column where participant IDs will be entered (e.g., column B).
- Go to Data → Data Validation → Data Validation.
- Select Custom and enter this formula:
=COUNTIF($B$2:$B$100,B2)=1
- Check Ignore blank and add an error message in the “Error Alert” tab. Click OK.
🧭 Important Notes
- Use a helper cell if the validation formula is too complex. Learn more.
- Data Validation doesn’t block mass copy-paste, so consider adding visual warnings too.
- You can combine it with Conditional Formatting to highlight errors immediately.
💡 What is a Helper Cell?
A helper cell is an extra column that helps calculate or validate data in your main column.
For example, if your validation formula is too long or complex to fit directly into Data Validation, you can write it in column C first:
=AND(LEFT(B2,1)="A", ISNUMBER(VALUE(RIGHT(B2,5))), LEN(B2)=6)
Then apply Data Validation in column B using a formula like:
=C2=TRUE
Column C acts like an “assistant” for validation, while column B is where users actually enter data.
Use a helper cell if the validation formula is too long or hard to understand directly in the Data Validation box.
📝 Practice:
- Create a student registration table with columns: ID, Name, and Class.
- Apply validation to the ID column as shown above.
- Also add automatic formatting if an ID is empty or duplicated.
🚀 Try It Now in Your Excel!
Don’t just read, go ahead and practice this custom data validation. If you need a more complete guide, join TTC’s free class:
Want to Learn Excel and Computer Skills for Free?
Visit our complete guides and join free classes from TTC: