Hands-On Lab: Protecting Specific Parts of an Excel Worksheet
⏳ Training Duration: 30–45 Minutes
🎯 Level: Intermediate
🧠 Method: Hands-on Practice
📦 Material Format: Interactive, usable offline
📌 Prerequisites: Able to use Excel and familiar with basic protection features
🎯 Objective: Participants are able to protect only specific parts of an Excel worksheet.
In daily Excel usage, the most common mistakes usually happen not because of incorrect formulas, but because data or formulas are accidentally modified.
The more people who work on the same Excel file, the higher the risk of unwanted changes, whether intentional or not.
That is why Excel provides several layers of protection that can be applied according to different needs, ranging from protecting the entire file, protecting a worksheet, to protecting specific cells or ranges.
Before moving into the technical steps, it is important to first understand the types of protection available in Excel and their purposes, so the applied protection is truly effective.
🔐 Three Types of Protection in Excel
Before practicing how to protect specific ranges, we need to understand the three main types of protection available in Excel. Each one serves a different purpose and level of security.
1. Workbook Protection
Workbook Protection is used to protect the structure of an Excel file, for example to prevent users from adding, deleting, or moving worksheets.
2. Worksheet (Sheet) Protection
Worksheet Protection secures the content within a single sheet, such as preventing changes to certain cells, deleting data, or editing formulas.
3. Range or Specific Cell Protection
This type of protection allows us to secure only specific parts of a worksheet, while other areas remain editable by users.
Protection in Excel does not always need to be applied to the entire sheet. In many cases, we only want to lock certain parts such as quantity columns, prices, or important formulas, while allowing other areas to be filled in by the team.
🛡️ Differences Between Excel Protection Types
| Protection Type | What Is Protected | When to Use |
|---|---|---|
| Protect Workbook | File structure (add, delete, or move sheets) | When you want to keep the worksheet structure unchanged |
| Protect Sheet | Cells in a worksheet (except unlocked cells) | When almost the entire sheet should not be edited |
| Protect Range | Only specific areas or cells | When only certain columns or sections need to be locked |
🎯 Case Study: Protecting the Total Column
In this Hands-On Lab, we will focus on Range or Specific Cell Protection, because this is the most commonly used scenario in real-world work environments: some cells are editable, while critical parts remain protected.
Before moving into the technical steps, pay attention to the protection logic below to avoid mistakes during practice.
- 🔓 Unlock cells or ranges that should be editable
- 🧮 Keep important cells (formulas / totals) Locked
- 🛡️ Enable Protect Sheet
- ✍️ Users can only edit the unlocked cells
As a simple example, imagine we are creating a sales report file that will be used collaboratively by several people.
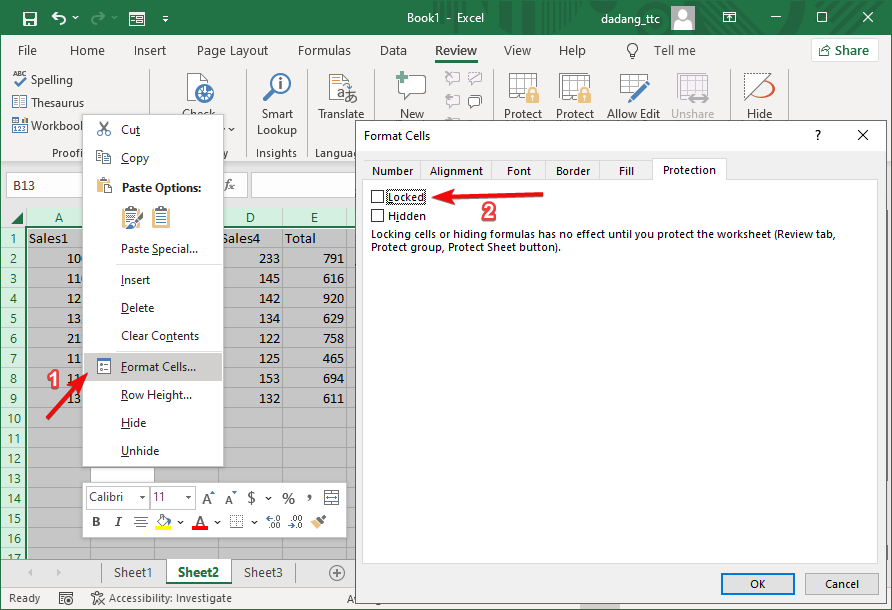
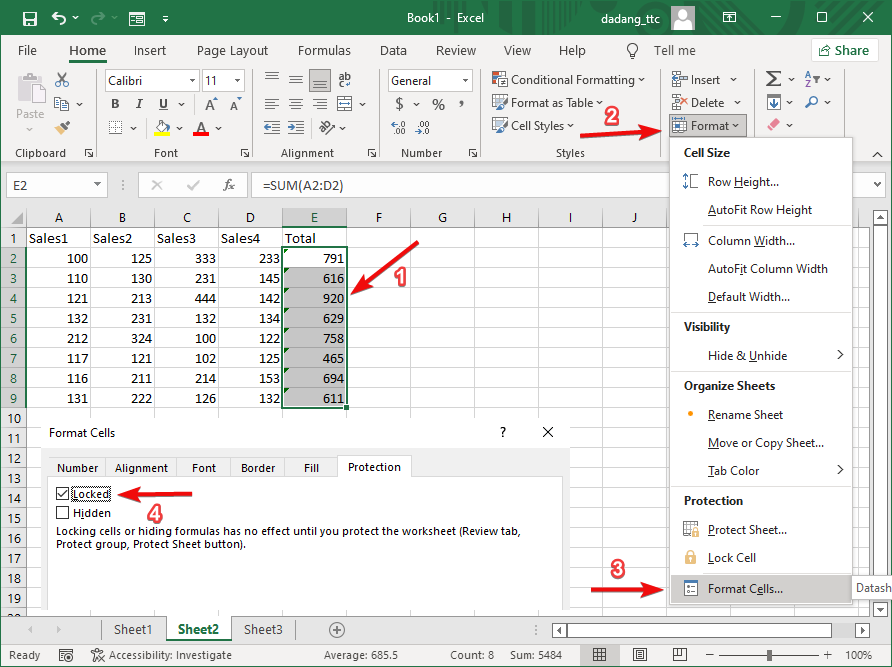
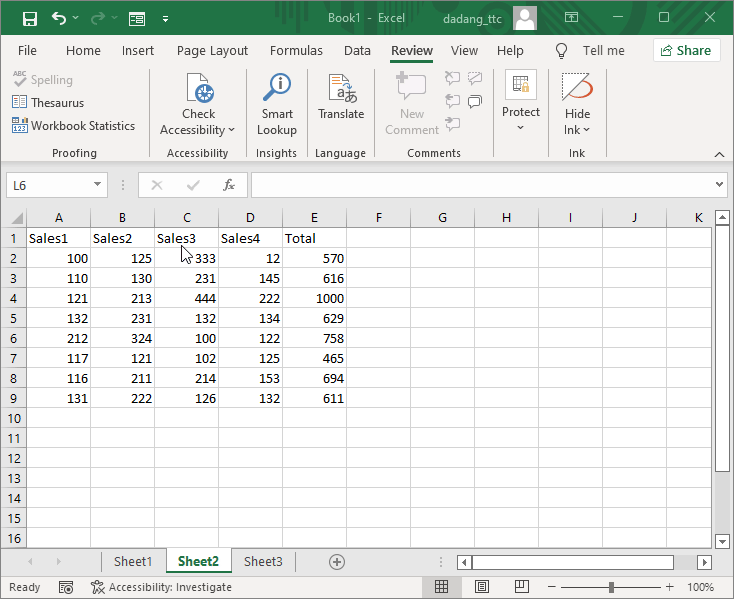
We have a sales data table with columns A to D. The Total column (column E) contains automatic formulas. This column will be locked to prevent accidental deletion or modification.
- Select all cells and open Format Cells → Protection, then uncheck Locked.
- Next, select column E (Total) and enable the Locked option again.
- Go to Review → Protect Sheet, set a password if needed, then click OK.

🔒 Advanced Settings: Allow Edit Ranges
For team collaboration, Excel provides the Allow Edit Ranges feature. This allows us to define who (based on network login users) can edit specific parts of a worksheet.
- Go to Review → Allow Edit Ranges.
- Click New, define the editable range, assign a name, and set the allowed users.
- Once finished, enable Protect Sheet as usual.
🧪 Case Study 2: Team Collaboration in Excel
In a finance team, the Amount column should only be editable by finance staff, while the Description column can be edited by everyone.
- Use Allow Edit Ranges to configure these permissions.
- Ensure each team member logs in using their Windows account.
With this technique, Excel files become more secure while remaining flexible for collaboration.
🎥 Video Tutorial: Protect Sheet Specific Range
In this video, we show a different example compared to the text tutorial above: using Excel Form where users can only fill in cells or ranges that have been designated, keeping important data safe. This practice helps understand how to set up protection specifically when forms are used for collaboration.
📥 Excel Demo File (Protect Range)
This Excel file contains the same dataset and examples used in the video, so you can follow along and practice directly.
⬇️ Download Excel Demo FileWant to Learn Excel and Computer Skills for Free?
Visit our complete guides and join free classes from TTC: